 |
| Copper wiring stolen! Empty switch boxes. |
Wednesday, June 6, 2012
Break in!
Three weeks into the project and we have a break in! Shortly after the electrical was rough in someone burglarized the house and stole some of the copper wiring that had been installed. The burglars managed to break in through one of the window openings even though the window was secured with a piece plywood.
This is one of the risks of doing these projects. Copper wiring is a favorite of thieves that hit construction sites looking for materials that can be sold to metal recycle vendors. Moving forward we decided to have one of the workers stay in the house for security purposes. We reported the incident to the police but there really wasn't much they could do at this point. Lesson learned!

Thursday, May 24, 2012
Working with Contractors
After putting out the final plans for bid to at least 3 contractors we finally decided on a contractor that was reasonably priced, had experience doing historic restoration and had a good reputation in being honest. Do your homework when choosing a contractor. This is definitely a buyer beware situation! For every honest general contractor out there there is at 1 contractor out there that does not operate honestly. Check the better business bureau for complaints, ask for references and never hand over the full amount for the project. Contractors tend to not disclose their specific costs so if they are not willing to work with you on labor and material costs, tell them to go bye, bye. Always have a signed contract and a draw plan to finance the project. Make sure that the contractor pulls all necessary permits. If your property resides in an historic district make sure that the contractor understands the processes involved when working in a historic district. You hire a contractor to manage the project but you still need to pay attention to the quality of the work being performed. Don't hesitate to ask questions and if you're not satisfied then ask again. A good contractor will be willing to work with you and should be open to constructive ideas from you the owner.
A-1 Construction got the winning bid. We signed a contract on May 16th and soon the place was swarming with the first wave of sub contractors to begin gutting and roughing in the electrical and plumbing systems.
 | |||||
| The wall between the living room and dining room is removed. |
 |
| Roughing in some of the plumbing. |
 |
| Electrical rough in. |
 |
| Gutted! Looking into the living room from dining room. |
A-1 Construction got the winning bid. We signed a contract on May 16th and soon the place was swarming with the first wave of sub contractors to begin gutting and roughing in the electrical and plumbing systems.
Friday, May 18, 2012
Removing the Vinyl Siding
While the back porch demo work was being completed, we decided to hire some one to remove the vinyl siding that covered the old house. Vinyl siding was popular back in the 60's and 70's as a no maintenance solution to having to repaint your house every 5-10 years. We had no clue when the vinyl siding was installed on our old house but we knew it needed to come off! We were a little worried about this part of the restoration because we did not know what we would find underneath the siding. We knew it that the original wood siding was still in place but we had no idea what condition it was in or what surprises we might find! The removal process took a week although it was relatively easy to take the vinyl off. We wanted to take care in making sure that the original wood siding was not damaged in the process.
In the end we were pleasantly surprised that the wood siding was in excellent condition with minimal damage to the boards. What was really interesting was that most of paint had come off or had been removed over the years. Even though the vinyl siding was ugly it did serve the purpose of protecting the wood siding underneath.
The original wooded windows had been removed and replaced with aluminum windows. You can see from the images that the original window cut outs were uncovered when the vinyl siding was removed. When the smaller aluminum windows were installed the large window cut outs were boarded over.
We also were pleasantly surprised to find some nice detail work on the front and side gables of the house. These details were seeing the light of day for the first in a very long time!
 |
| Before Vinyl Removal |
 |
| After Vinyl Removal |
 |
| The original wood siding |
 |
| Wood Shingle Detail on Side Gable |
 |
| Detail on Gable was Uncovered |
The original wooded windows had been removed and replaced with aluminum windows. You can see from the images that the original window cut outs were uncovered when the vinyl siding was removed. When the smaller aluminum windows were installed the large window cut outs were boarded over.
We also were pleasantly surprised to find some nice detail work on the front and side gables of the house. These details were seeing the light of day for the first in a very long time!
Sunday, May 13, 2012
The Old Back Porch
After the wonderfully ugly rock wall on the front porch was demo'd we worked on getting plans drawn to put out for bid to at least 3 contractors. The process took awhile as we selected a designer to work with and then waited for the the final plans to be settled as we worked through changes. In the meantime there was still other demo work that needed to be done.


 We decided to tackle what used to be the original back porch of the house. Over the years the area had been enclosed and a wall was installed to make it the area into 2 rooms. You can see from the images that the wall between the 2 rooms was pretty solid as it has pine boards running on both sides of the wall. After 2 days of demo work the room opened up to a nice open space. At this point we have several ideas for the space but will decided further down the road.


Friday, February 10, 2012
The Front Porch


Friday, January 13, 2012
And the Wall Comes Tumbling Down!
 |
| Before Demo of Rock Wall |
 |
| Removing the first rocks. |
 |
| Surprise!....there's another wall! |
 |
| Stuccoed cinder block wall exposed. |
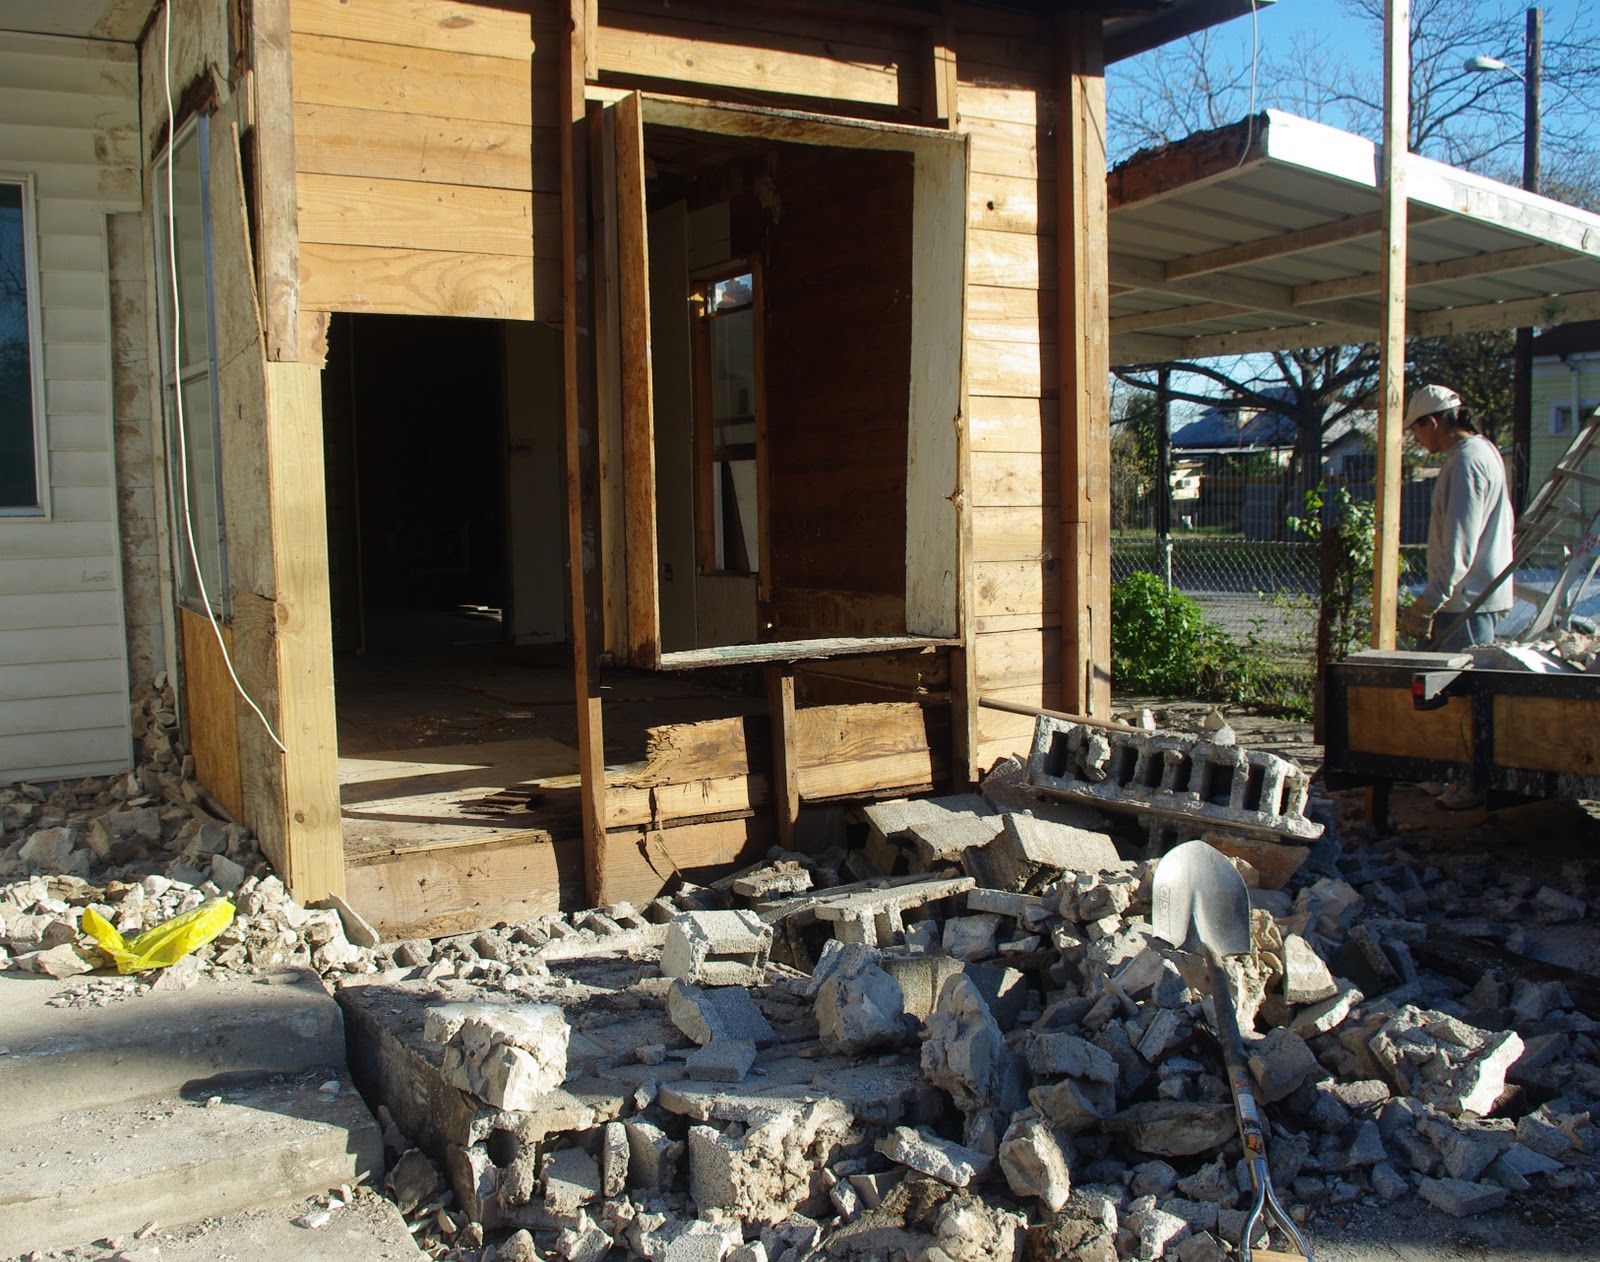 |
| The rock and cinder block walls are gone! |
 |
| Post Demo Ruble! |
Foundation Repair
December was a busy month! Besides all the holiday activities and some holiday travel, we actually got quite a bit accomplished on the old house. The major project was repairing the foundation. If you're going to do anything first on an old house project, tackle the foundation first! It will save you some headaches later on in the project and and will ensure to a major degree that the house is plumb and level. In our case we decided to replace all the cedar posts or piers with concrete pillars. We also discovered some major rot on several on the supporting beams on the edge of the house....those had to go! The majority of the piers were the original wooded posts so there were close to 100 years old! We hired a local foundation contractor who had done some previous work for us on another project and they did a good job. It took them about a 2 weeks only because of weather delayed their progress. As with all contractors make sure to check references and always stay close to the work being done.


Subscribe to:
Posts (Atom)