
Showing posts with label old house. Show all posts
Showing posts with label old house. Show all posts
Friday, April 19, 2013
The Roof
Finally, after almost 3 months of slowly working on cleaning, scraping the rust off, priming and painting, the nearly 100 year old metal roof is sporting a new coat paint! The old gal looks good!

Monday, March 25, 2013
The Back Porch
 |
| Before |
 |
| After |
Sunday, March 24, 2013
New Additions!
 |
| Before: Ugly Fence! |
 |
| Before: More Ugly! |
 |
| Nice Fence! |
 |
| Improved Curb Appeal! |
Friday, January 25, 2013
The Roof
 |
| Metal Roof |
 |
| Sanding and Cleaning Progress |
 |
| Primer coat |
After some research and speaking with local contractors we settled an a three step approach.The first step involved removing cleaning the as much of rust off the metal. Because of the age of the roof we decided to do this slowing with wire brushes and hand held power sander. As you can image this is a slow process but worth the effort. The second step involved brushing on a good coat of primer designed to stop the oxidation process. The last step will be to paint on a coat of metallic colored paint to give a metallic look of a new metal roof. As you can see from the picture the paint job is still a work in progress. Stay tuned....more to come later!
Thursday, January 24, 2013
Catching Up!
Its been awhile since I've posted an entry on this blog so I need to catch up! We finished the project in Oct of 2012, well actually we are still doing some work on the house but the house is now totally livable. The folks that were interested in buying the house back out of the sale but they agreed to lease the house at a market rate rent so we are getting a positive cash flow. So its still a good deal for us.
In the meantime I got busy doing some landscape work in the front of the house. Remember that pile of rubble and stone that was removed when we demolished the wall around the porch? Well, the cut stone came in handy for some low cost landscaping. We also laid down crushed or decomposed granite in the drive way and sidewalk.
One last thing....It's always nice to get noticed. The house was featured in the city's Office of Historic Preservation Jan issue of their newsletter as an example of a substantial restoration! You can check out the newsletter at: http://www.sanantonio.gov/historic/Newsletter.aspx
Very Cool!
 |
| Rock Pile |
 |
| Recycled Rock Pile |
 |
| Nice Rocks! |
One last thing....It's always nice to get noticed. The house was featured in the city's Office of Historic Preservation Jan issue of their newsletter as an example of a substantial restoration! You can check out the newsletter at: http://www.sanantonio.gov/historic/Newsletter.aspx
Very Cool!
Thursday, September 20, 2012
Painting the Exterior


The porch decking was also painted and what a difference a little color makes. Notice the color on the porch ceiling, its a pretty sky blue. The word is that traditionally houses in the south typically would have their porch ceilings panted a sky blue color to confuse wasps from building nests underneath porches.
The skirting around the house was installed a few days ago and that also received a couple of coats of paint. Vents still need to be installed and that will be done in the coming days.
We're reaching a point in the project where most of the work is now touch ups and detail work on the structure. We are close to the finish line. We still need to get final inspections on electrical, plumbing and HVAC system. The front porch roof and work on the drive way need to be worked on but we can feel the end in sight!
Wednesday, September 5, 2012
House is Primed and Ready
A big milestone in any restoration project is when you get the house coated with primer. Of course there's a lot of prep work that goes into getting to this point. Ideally you want to scrape off as much of the old paint and get as close as possible to bare wood. In this case most if not all of the paint had either fallen of over time or had been scraped off in previous attempts. Lead abatement is always a consideration when working on homes built in the early 1900's however in this case there was so minimal paint on the walls that we did were allowed to use a water method to remove any existing paint. Using a gentle power wash method minimizes dust and aerosols. Any flakes that came off were collected and safely disposed according safety protocols.
After the cleaning of the house the entire exterior of the house was coated with high grade primer. At this point the house ready for it's colors!


After the cleaning of the house the entire exterior of the house was coated with high grade primer. At this point the house ready for it's colors!


Friday, August 10, 2012
Kitchen Work
 |
| Kitchen counter tops and cabinets |
 |
| Butler's pantry |
Sunday, August 5, 2012
The Floors Get A Second Chance!
Before we purchased the house we made sure that the floors that were underneath the nasty old carpeting, paint and linoleum were in good shape. We discovered that the original flooring was tongue and groove long leaf pine. Except for some rot we found along in some areas of the house, especially around the old bathroom, the flooring was in decent shape. Nothing that a good sanding could not take care of in restoring the flooring back to life!
The entire sanding and finishing of the floors took about 10 days. What slowed the process down was that in some of the rooms the old glue used to tack down the linoleum was especially difficult to remove. Repairs to rotten pieces were also made during this time as well shoring up soft spots in the floor. We decided not to stain the floors instead we opted to put down 2 and 3 coats of clear poly urethane to bring out the grain of the wood. You can see by the images how the floors eventually turned out....not bad for being under cover for who knows how long!
 |
| Floors before refinishing |
 |
| Sanding off the old glue! |
 |
| Looking Good! |
 |
| Living room floor. |
 |
| Dining room floor |
 |
| Finished floor with poly coat. |
Tuesday, July 24, 2012
Restoring Details
One of the biggest challenges we knew we had going into this project was in trying to restore some of the architectural elements and details of the house. Over the past 100 years the house was literally gutted of its original windows, the original wooded floors had been either painter over or covered over with carpet or linoleum and much of the original case trim around the doors of most of the interior doors was gone by time we acquired the property. In some of the rooms there were remnants of what was once beautiful base molding that that was paint a bright yellow color! We salvaged those pieces but because there wasn't enough molding for all the house we decide install a simple, wide base molding to at least give the floor and wall some additional profile. We did the same for casing around the windows. All the casing had been removed when the original windows were replaced with aluminum windows. This house was built in 1912 in an era when this types of house had lots of craftsmanship detail such rosettes and plimps around doors, so we speculated that at one time this was the case for our house.
Since manufacturing and recreating much of that detail would be cost prohibitive we decided to make simple case trim out of 1x 6 pine boards for the windows and interior door openings. We had the carpenters make simple block rosettes to fit at the corners of the trim.
The porch was relatively easy in terms of finding materials. Elements such as turned posts and spindles are readily available at either local lumber suppliers or vendors that specialize old house architectural supplies.
The crown molding that we used in the foyer and other parts of the house was actually harvested from a house that was recently demolished. This was nice find as it saved us some significant dollars. Get to know your local old house harvester!
Finally, we installed an antique stained glass piece in the transom located in the foyer. This added a nice touch to the foyer and to the hallway entry.
The point of this ramble is that you sometimes you need to get creative in finding solutions that are cost effective yet stay close to original details.
 |
| Trim around windows |
 |
| Detail on porch |
 |
| Spindles add some nice detail on porch |
 |
| Harvested crown molding and antique stained window in transom |
The porch was relatively easy in terms of finding materials. Elements such as turned posts and spindles are readily available at either local lumber suppliers or vendors that specialize old house architectural supplies.
The crown molding that we used in the foyer and other parts of the house was actually harvested from a house that was recently demolished. This was nice find as it saved us some significant dollars. Get to know your local old house harvester!
Finally, we installed an antique stained glass piece in the transom located in the foyer. This added a nice touch to the foyer and to the hallway entry.
The point of this ramble is that you sometimes you need to get creative in finding solutions that are cost effective yet stay close to original details.
Friday, July 20, 2012
Window Installation
The first of the new windows were installed today. It was great to see the old house withe a new set of windows. Restoration purists could take issue that we did not put in wooded windows that matched the era of when the house was built in 1912. Windows that were typically used in the early 1900's were double hung, single pane glass with probably having a 2 over 2 or 4 over 4 lite configuration. Typical of window construction of the era had open cavities covered by casing where iron or metal would hang. The cavities where the weights hung are typically sources of drafts in these older homes.
We decided to balance this piece of the restoration on cost considerations, ascetics, and energy efficiency. The windows we chose were custom made to fit the original window openings and are double pane and well sealed. This option will significantly cut down drafts and still retains some of the profile found in older historical widows.
 |
| Getting window ready for installation |
 |
| Good Fit! |
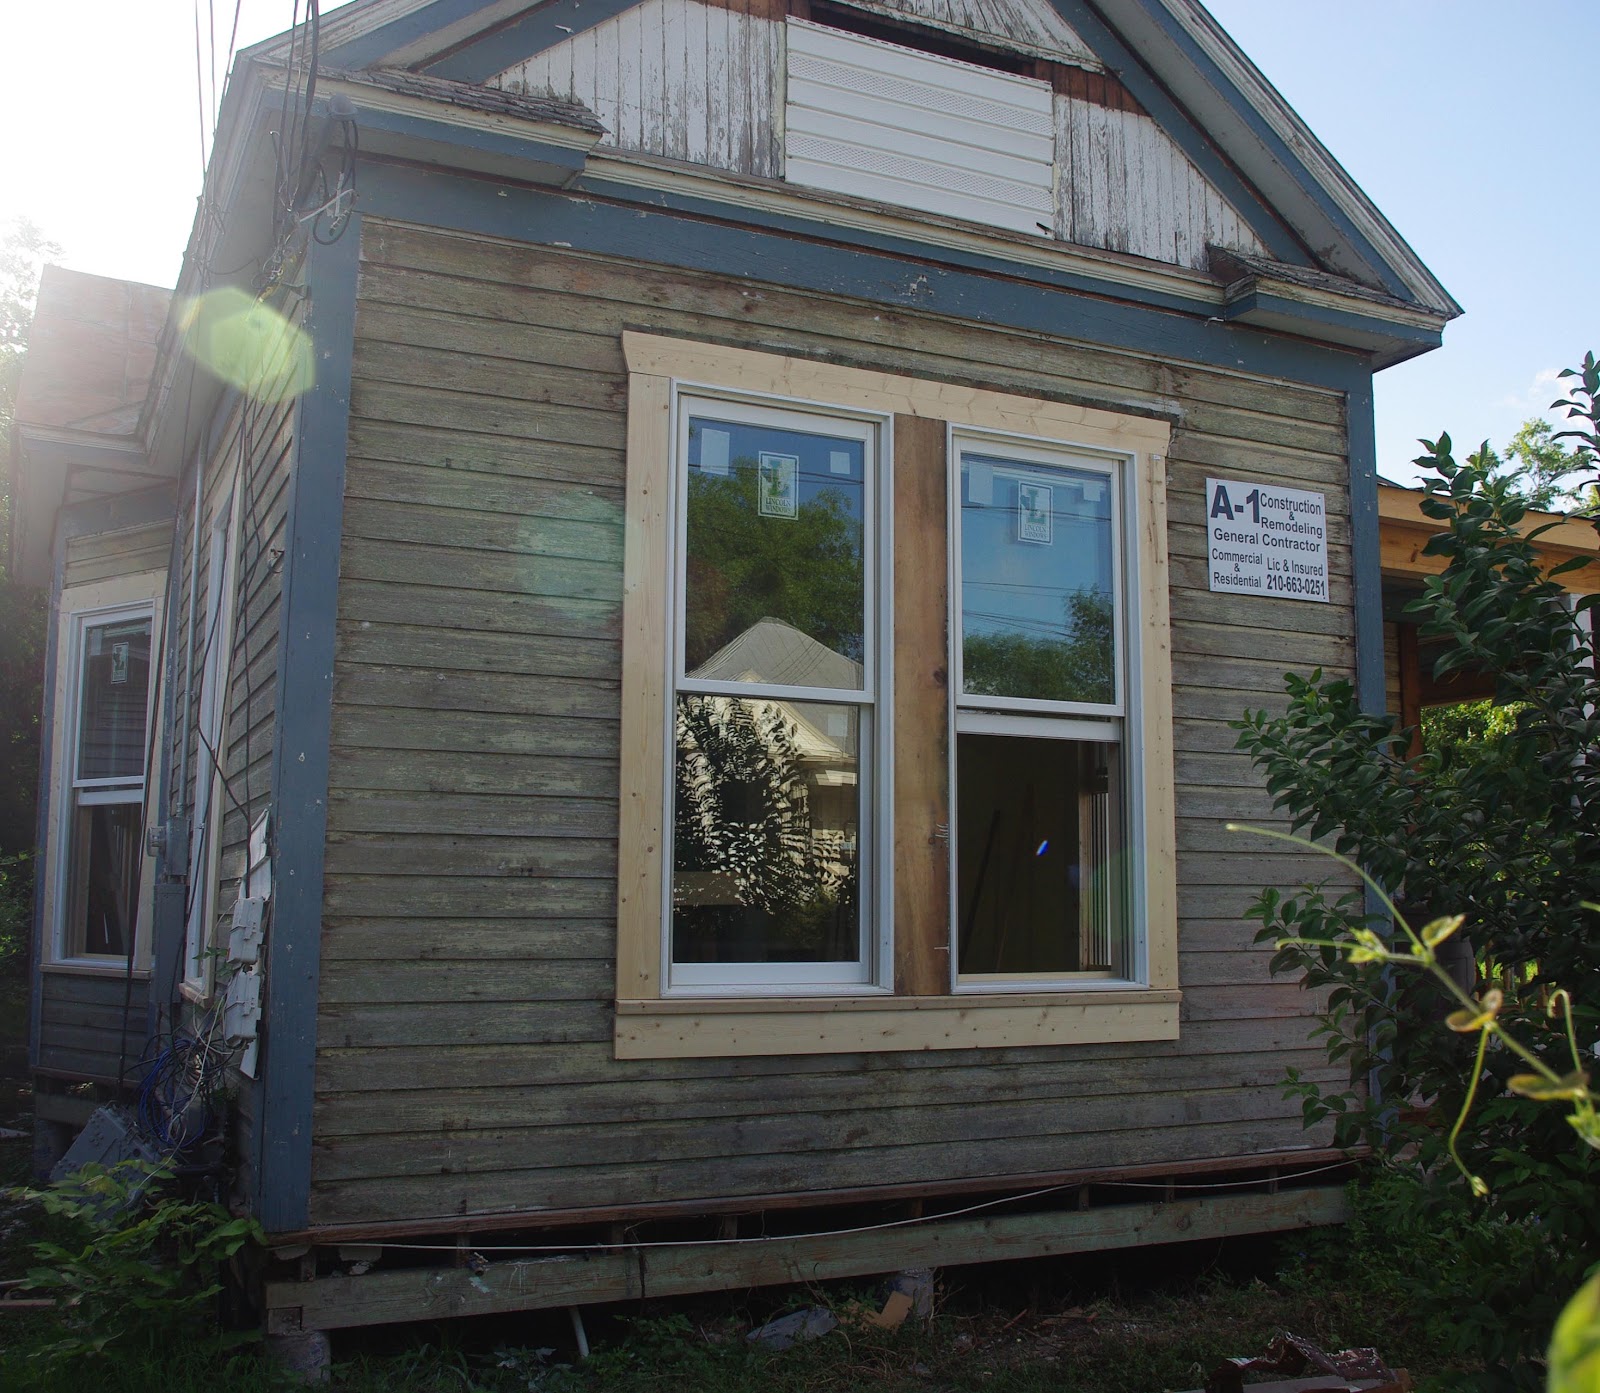 |
| Main windows in front to house |
 |
| View from inside the living room |
 |
| Windows of the front porch |
 |
| Window trim matched to old trim dimensions |
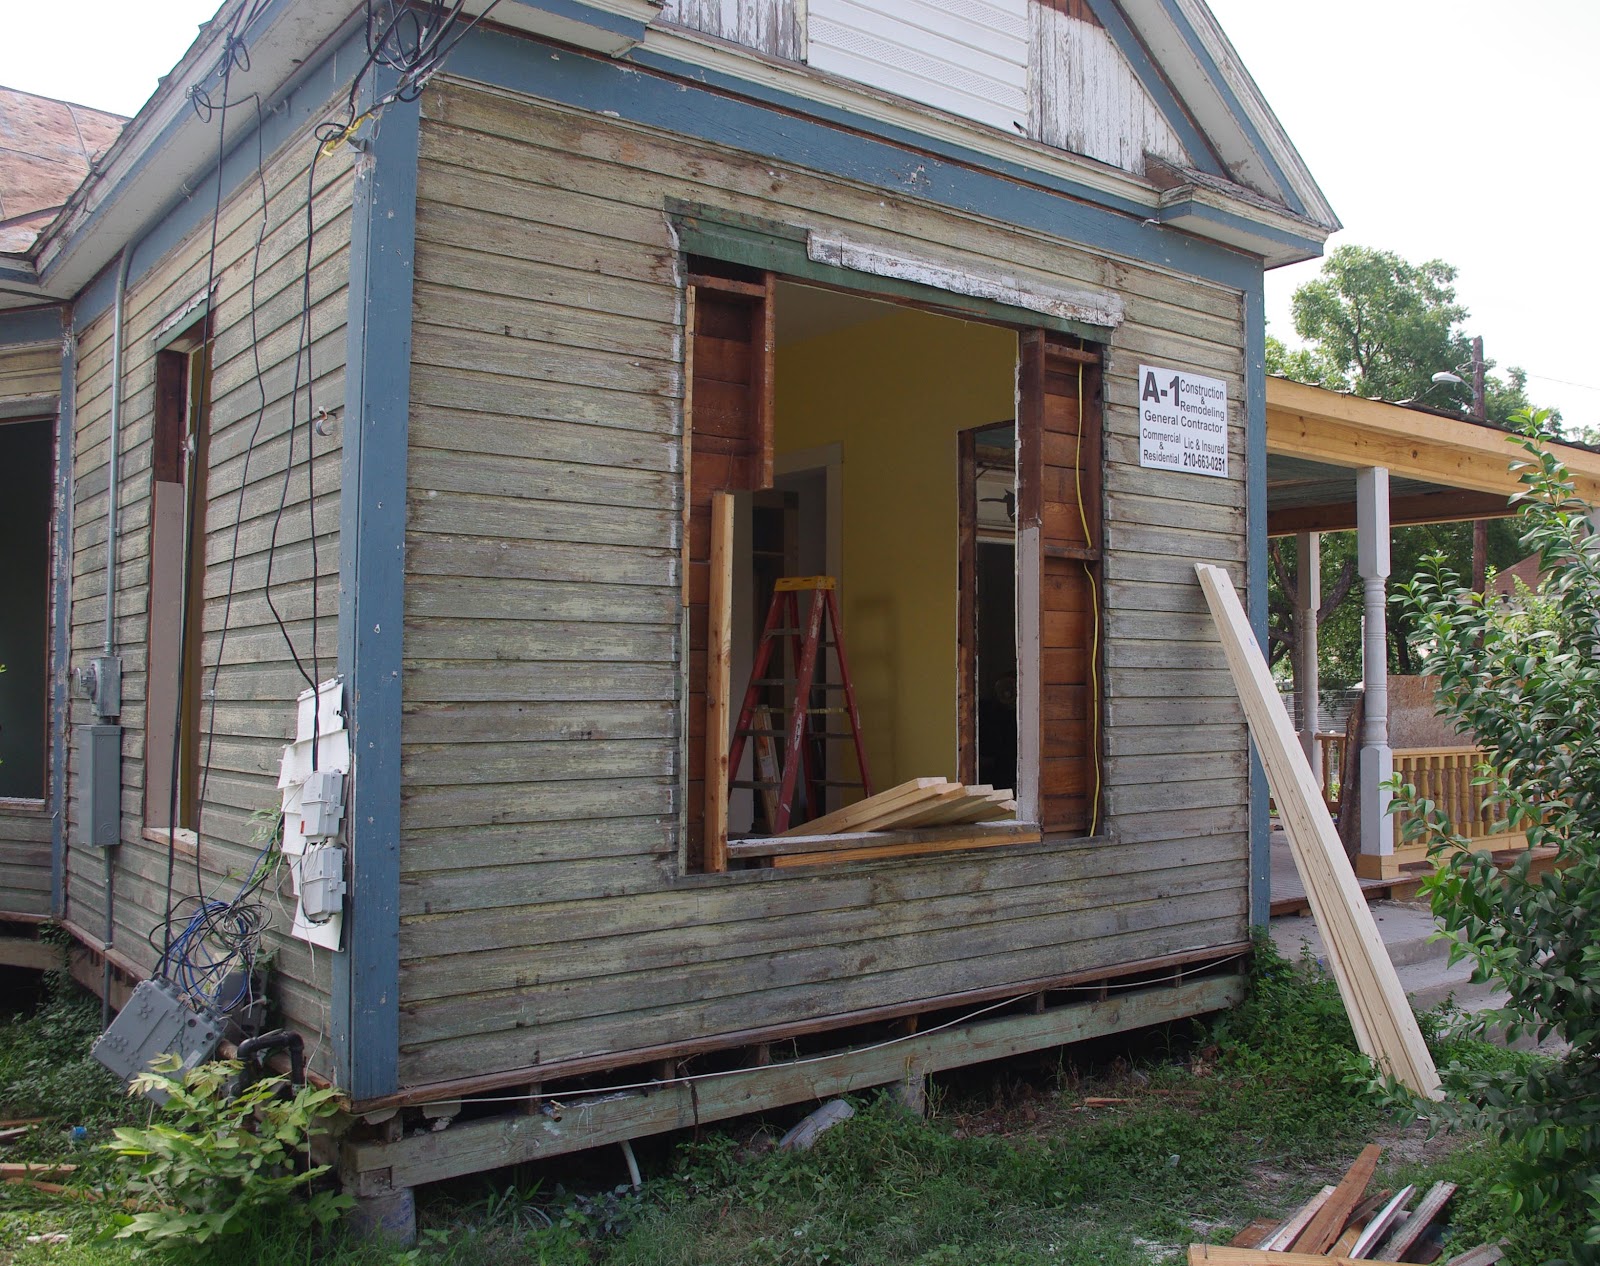
Wednesday, July 18, 2012
Window Prep Work
We've reach the point of prepping the new window spaces. As part of the project plan we made a decision early on to replace the existing aluminum framed windows with wood vinyl clad windows. These windows were approved for installation by our local office of historic preservation. Windows in historic buildings are a key element in preservation efforts. When doing restoration or rehab projects in a historic district always check the with local historic preservation office to make sure that you're following their guidelines for window replacement. In our case we opted to replace the windows with double pane, wood and vinyl clad windows that closely matched the dimensions of the original windows. As you can see from the images the old window openings had to be re-worked in order to be able to fit the new windows which will be installed in the next few days.


Saturday, July 14, 2012
Colors on the Walls!
One of the fun aspects of doing these projects are the many decisions you have to make along the way. Color choice is one them.
But I need to back up a bit. Since the beginning of this project we've had a potential buyer for the house. This young professional couple approached us shortly after we bought the house in Oct of 2011. We don't have a contract for the house but we decided to involve them from the start of the project for their input and ideas. Even if we don't wind up selling them the house the project will benefit from their perspectives on. However, at this point of the project I feel confident that we will be able to finalize a deal.
Getting back to the colors on the walls, we allowed our young buyers to choose the colors for the house. I think they made some pretty good color selection decisions. Not bad!We still have a ways to go but it sure feels good getting to this point!
But I need to back up a bit. Since the beginning of this project we've had a potential buyer for the house. This young professional couple approached us shortly after we bought the house in Oct of 2011. We don't have a contract for the house but we decided to involve them from the start of the project for their input and ideas. Even if we don't wind up selling them the house the project will benefit from their perspectives on. However, at this point of the project I feel confident that we will be able to finalize a deal.
 |
| Looking into the living room from dining area. |
 |
| Looking into the dining area from the living room. |
 |
| Master bedroom |
Friday, July 6, 2012
Dry Wall is Installed!
 |
| The back porch converted to kitchen space |
 |
| Looking into the dining room |
 |
| Bedroom with closet added |
 |
| Back porch converted to kitchen space |
 |
| Space created for "butler's pantry" |
 |
| Living room |
 |
| Main hall way |
Subscribe to:
Posts (Atom)